Before You Begin: How to Engrave a Large Stone Mural

wood etched image

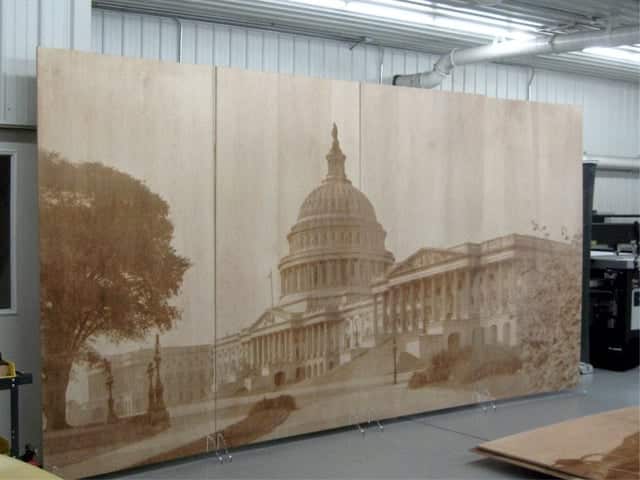
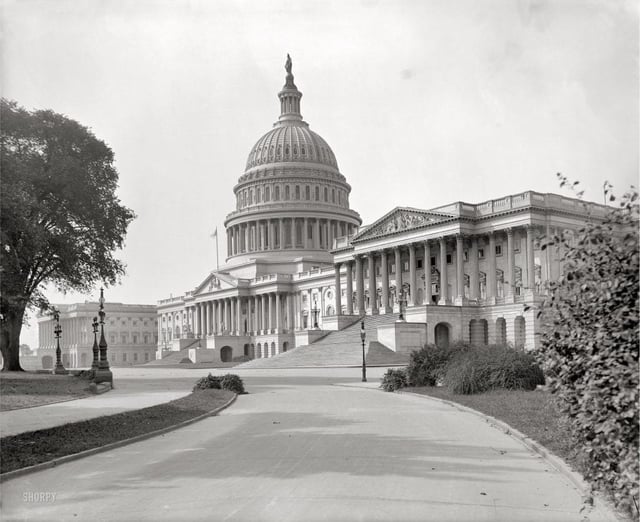
I can only imagine what it was like a hundred years ago. I often find myself captivated by old technology, rich landscapes, and unique faces as I stare into timeworn magazines. Why do we love images so much? They say a photo is worth a thousand words and I believe a large mural can convey, with just a single still image, a story in spirit more effectively than a description does.

I live in a rural city in Minnesota and with a quick drive around town, I can begin to notice large paintings, engravings, and artwork that find their homes in street allies, school cafeterias, bank lobbies, and even parking lots. I even saw an amazing stone World War II memorial engraved at the veteran’s park as a large historic mural. These large marble and granite wall tributes are fantastic pieces of black and white decorative information.

In times past an artist would toil numerous hours preparing and painting an available wall to create a detailed mural. Now, with the advent of computers and lasers, an artist can utilize modern technology to design and engrave personal photos in stone, metals and many other materials.

wood mural

HOW TO ENGRAVE GRANITE OR NATURAL STONE

I have enjoyed spending the last 18 years working on laser equipment, teaching laser graphics software, and learning how to effectively laser engrave images and pictures on just about every type of material possible. Let’s walk through the process but to begin with let’s define what a mural is. A mural is any piece of artwork applied directly on a wall, ceiling, or another permanent surface.

There are at least 4 factors to consider when making a stone mural with a laser machine.

I. SELECTING AN IMAGE

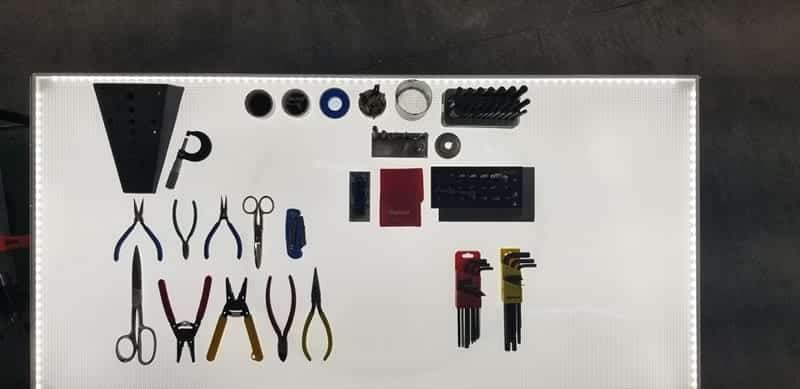
Will any photo work? No! The biggest misconception with laser engraving photos is thinking any photo will work. Reflect on the photo itself before thinking about the laser machine or the wall, and you will find that you want the best picture possible to tell your story. This image must have clarity, contrast, and noteworthy consideration. The picture should be clear and crisp. You will be enlarging this image to fill an entire wall so find a picture with as high of resolution as possible, preferably 600 DPI or more. Preview your image in black and white as it reveals the best contrast.

Take a look at the background and the main subject of the photo to see that it has excellent contrast. You do not want similar colors throughout the image but find pictures with as many details of dark and light shading as possible.

Finally, consider what you want your image to say to others. Why are you choosing this photo for the mural? Be sure the photo is relevant and unique for the attention it will receive.

image

II. PROCESSING AN IMAGE

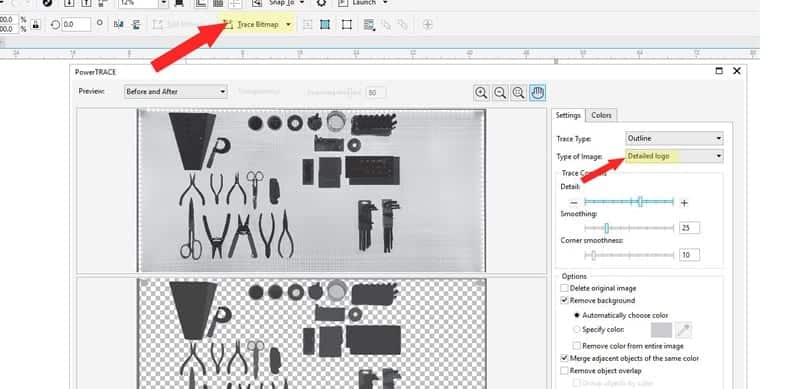
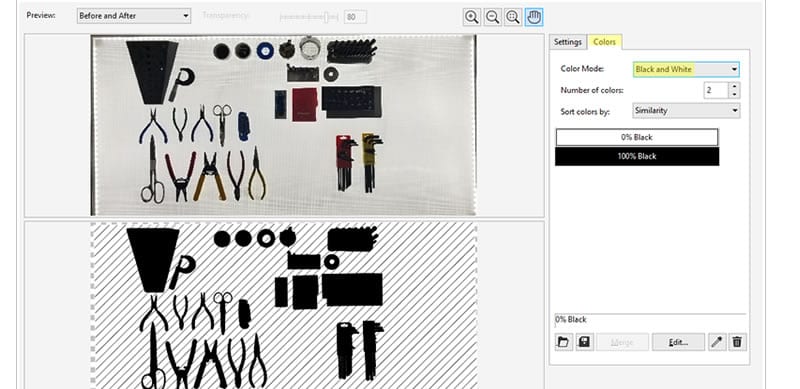
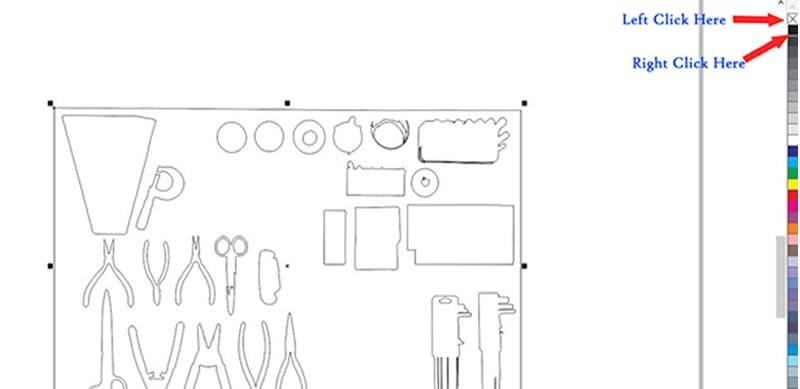
Once you have selected a good image, you will need to process the picture using a computer and software. The process will turn your original picture into a series of precisely arranged black and white pixels for the laser machine’s engraving process.

A process called dithering is first required before laser engraving. If you look closely at a newspaper photo, you will see that the image has gone through a dithered effect to give you good image quality on a black and white newspaper.

Dithering is the process of contrasting pixels of two colors to create the illusion that a third color is present. By combining black and white pixels in complex patterns a graphics program like CorelDraw or Adobe Photoshop will create the illusion of gray values. This dithering process causes a printed image to appear more photographic by inserting shades and reducing color hues. Dithering simulates more colors and shades in a palette than actually exist.

black and white

While dithering cannot produce identical results as having sufficient levels of gray or colors in the graphics display system (the color depth), it can make shaded drawings and photographs appear extremely realistic.

A laser program called Photograv will allow you to import any image and the computer software will calculate the correct dithering effects automatically depending on what type of material you choose to engrave on. This software knows if you choose stone and will create the exact amount of pixels needed for your laser engraving.

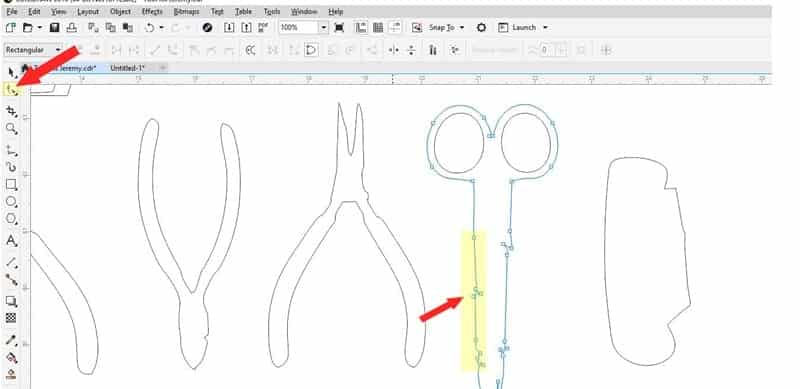
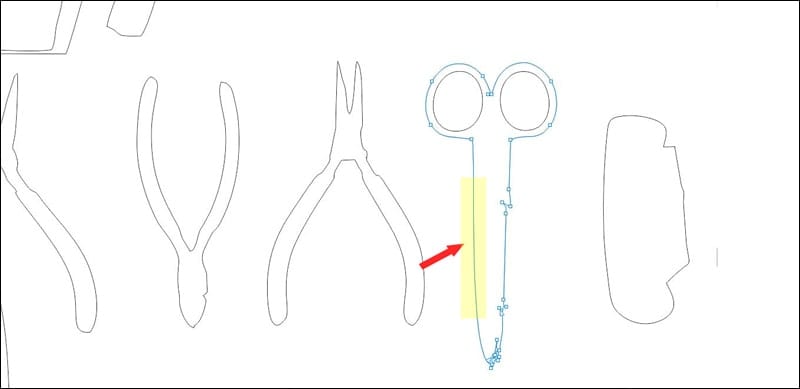
A large wall mural may be several feet in length and height. The images will need to be “sliced” in the graphics software to no larger than a 4 x 4 ft. size because of the laser machine table restriction and handling of the large stones.

Z12 engraver

III. CHOOSING A LASER MACHINE

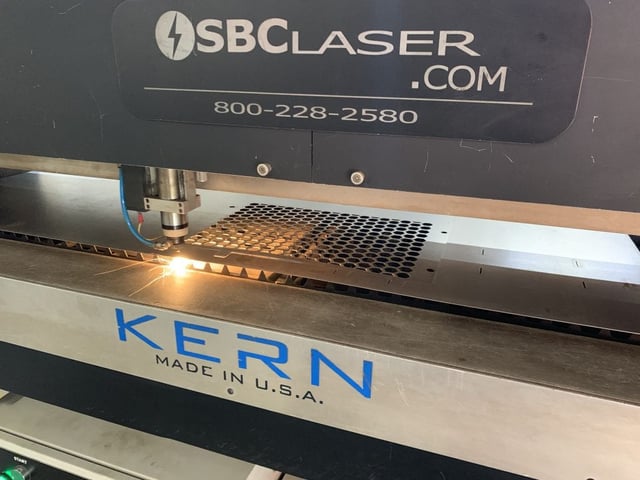
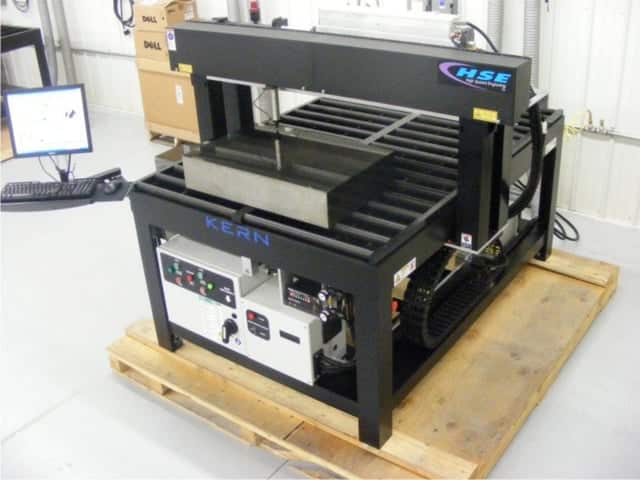
I have seen and operated many laser machines throughout the years. One of my favorite engraved products is wall murals. The difficult part of the process is locating a heavy duty laser table capable of handling large pieces of stone. The ability to laser engrave big panels and huge pieces of material can only be achieved on a strong steel base with a smooth traveling engraving gantry that rides over the top of the stone.

Another consideration for the large stones is how you will load these pieces into the machine. One method of loading the heavy items is by carting the pieces to the laser machine then pushing or pulling the stones into position on an industrial roller table. The other method would be to use an open bed laser system where you can drive a scissor lift stand to raise the work-piece to the proper focus position once parked in the laser machine.

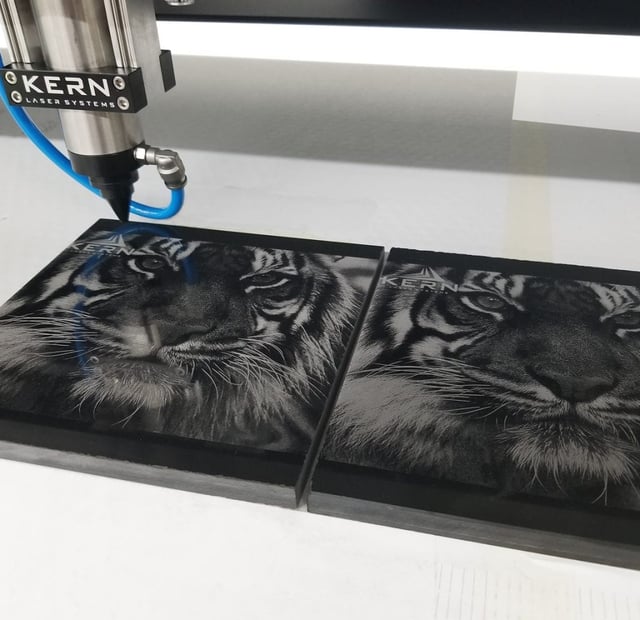
The stones will be pulsed with a small amount of laser energy to create beautiful images on the surface of the stone using a CO2 laser. The technology for CO2 lasers has been around for over 50 years but the size for these powerful units keeps getting smaller and smaller. I have found that a minimum of 50 watts is ideal for stone engravings. You can easily adjust the power or wattage of the laser using the machines control software. The laser is micro-fracturing the stone and if a too high wattage of laser is used the images will lose detail and look all white.

IV. WHAT TYPE OF STONE TO USE

Can I use any stone material with a laser? No. The best stone material for outdoor use is black granite. The common igneous rock that many countertops and cemeteries use for headstones works well for laser etching murals too. If you are considering inside use many black marble tiles or even-tempered glass works very well. The finer the grains and the more solid black the better.
The color black works very nice with murals as it creates a beautiful black and white image. One of the most common reasons people want to behold art in black and white today is because it lends a certain timeless quality to the images. This is because we still think of black and white as being a throwback to the photographic past.

stone monument

I sometimes think, “What would my grandparents think of invisible laser light making a picture right before their eyes”? This process of laser engraving is so amazing and rewarding as you see the life-like images come to life. Next time you behold a large stone mural, consider the time, process and machinery involved in making this enormous piece of art.

Laser Processing Nozzles

etched marble

Nozzles

Do you know when and why to switch nozzles on your optic assembly? Did you know there are different nozzles for your optic assembly that allow for better quality cuts? Depending on what substrate you are cutting or engraving, choosing the right nozzle may help you in processing your material, improving your quality while minimizing wear and tear on your equipment.  From acrylic to metal, this article will give you guidance into choosing what nozzle may be the best for your application.

tiger engraving

NON-METAL CUTTING NOZZLES:

Kern offers two types of aluminum nozzles for the S-FOCUS optic assemblies. These are the standard nozzle and wide opening nozzle.

Our standard nozzle has a .100” diameter opening, and is a good all-around nozzle for processing of materials. It delivers a good amount of air pressure through the cut and also protects the lens from debris buildup and back reflection.

The wide nozzle has .350” in diameter, and is typically used for cutting or engraving plastics and acrylics. The wider nozzles disperse the airflow over a wider area while still protecting the lens from buildup. Using this nozzle when engraving greatly reduces “fogging” or “ghosting” on your plastics or acrylics.

wide and standard nozzle

METAL CUTTING NOZZLES (CO2):

Kern offers two types of metal cutting nozzles for our CO2 laser systems. These are copper nozzles with openings of 1.5mm and 1mm.

The standard nozzle on our CO2 metal cutting assemblies has a 1.5mm diameter opening. This nozzle is a great general metal cutting nozzle and works well on almost all metals.

If you find yourself replacing your optics more frequent than you like, try switching to a 1mm nozzle. The beam alignment through this smaller nozzle becomes more critical and will need to be re-calibrated. However, the smaller opening drastically reduces that amount of splatter reaching the optic. The smaller opening also reduces the use of assist gas. For example, if you were running the same part with 100psi assist gas on the 1mm nozzle, the run time on a 244 CFM oxygen tank would run 227 minutes, vs a 1.5mm would run only 67 minutes with the same settings.

copper nozzle

copper nozzle 2

FIBER NOZZLES:

The FiberCELL system is equipped standard with a “double-nozzle”. Double nozzles are essentially a nozzle within a nozzle. As the cutting gas enters the first nozzle, cross airflow is created. This cross flow creates a barrier, which greatly reduces the return of splatter, prolonging optic life.

Similar to the CO2 Metal Nozzles, the Fiber Nozzle also comes in multiple sizes do decrease splatter and regulate assist gas usage. The standard size comes with a 1.5mm opening, but have the options of a 1mm and 2mm as well.

fiber laser nozzle

For more information on nozzles and the best application use for your company, please contact a friendly salesperson.

Visit Laserlocker.com for all your system part needs.

laserlocker

Customer Spotlight – SBC Laser

cool product

HOW TO CREATE A MIXED MEDIA GIFT USING A LASER

How do you say “Thank You” to an outstanding client or customer? Nick Caito of SBC Laser demonstrates his take on adding a personalized touch to a unique gift. In this Platinum Partner build, Caito mixes steel, acrylic, and brass with a combination of laser cutting and engraving with his Kern 400W HSE laser system.

SBC Laser

MATERIAL NEEDED:

• 18 ga mild steel
• 1/4″ acrylic (clear and black)
• .020″ brushed brass (used here is from Rowmark)
• Brass acorn nuts, washers, and bolts
• Blackening chemical

SUGGESTED PARAMETERS

18 ga Mild Steel
Speed: 2″/sec
Power: 90%
Frequency: 600Hz
Assist Gas: Oxygen (100psi)

Acrylic Etching
Speed: 80″/sec
Power: 25%
DPI: 300
Assist Gas: Compressed Air (20psi)

Acrylic Cutting
Speed: .5″/sec
Power: 30%
Assist Gas: Compressed Air (5psi)

HSE metal cutter

Step 1: Set Parameters and Cut Mild Steel

When cutting metal, laser focus is an important aspect. As the mild steel is cut, it heats up and tends to move around. If using a Kern (like we did for this project), the automatic height follower maintains a consistent focus point over the entire sheet.

bent metal

Step 2: Form Metal

This custom cage and base are bent using a folding table. No welding was required.

cutting acrylic

Step 3: Cut and Engrave Metal

Lasers are popular tools when processing acrylic.

Step 4: Blacken Steel

A chemical process used applied to the steel, giving it a blackened look.

finished goods

Step 5: Assemble

The only fasteners used on this project are decorative brass acorn cap nuts.

Thank you SBC Laser for sharing your build with us, and allowing us into your shop. This project can also be seen on Instructables.

Customer Testimonial – Family Laser

family laser

Dad and 3 Sisters Start a Customized Laser Business

See how the three sisters of Family Laser started their company, why they chose a Kern system, and how they use their system for custom laser cutting and engraving.

President and Designer Amie Roberts, along with her sisters Amber and Ashley, explain how Kern’s laser cutting equipment factored into rapid growth for their new company and helped them meet their goals of managing both family and business. By creating custom home decor and other gift ideas, along with a great social media presence, their business really started to expand. It took 5 years to upgrade to a larger laser system with more capabilities. As a result, Amie says they can produce multiple products on one system allowing for faster production times, larger jobs, and more time with family.

“Our mission is to be recognized as a destination that provides a unique menu of high quality, customized laser and sublimated products made for our growing base of customers. We strive to operate a business that any family could be proud of. That means taking care of customers through quality products and personal service.”

~Amie Roberts

Family Laser

Customer Spotlight – MX Trophies

mx trophies

A Custom Trophy Build

Do you have a need to process wood, plastics, metals and foams with one machine? Kern offers this versatility for a wide spectrum of customers and ultimately their imagination is their only limitation.

card holder

MX Trophies, a Kern customer, uses their creative skills daily to produce custom awards, plates and medals. The ability to personalize individual products to each event allows them to stand out from their competition. Here is how MX Trophies uses a combination of stainless steel and acrylic to create a custom business card holder.

MATERIALS NEEDED:
  • .050″ stainless steel
  • .125″ cast acrylic
Step 1: Create and Export File

Within CorelDRAW, multiple cut-line colors are used to assign settings to the different substrates being cut. The image or text is added to areas that need to be engraved. Once the file is complete a simple export tool sends the creation to the laser.

steps to follow

Step 2: Set Parameters

KCAM software is used to set the laser power, speed, and other common settings.

Step 3: Cut Stainless Steel

Load the steel sheet and adjust the focal height of the metal cutting assembly. Enable the cut-line colors assigned for the stainless and click Start.

laser cut

laser cutter

Step 4: Cut and Engrave Acrylic

Install the acrylic processing head and honeycomb bed. Add standoffs to reduce flashbacks on the back side of the acrylic being cut. Load the acrylic sheet. Enable the cut-lines color assigned to the acrylic as well as the engraving option, and click Start.

stand offds

no back reflection

Step 5: Assemble

card holder

Suggested Parameters (250 Watt Laser):

.050” Stainless Steel
Speed: .75”/sec
Power: 90%
Frequency: 1000Hz
Assist Gas: Oxygen (100 psi)

Acrylic Etching
Speed: 50”/sec
Power: 20%
DPI: 300
Air Pressure: 12psi

Acrylic Cutting
Speed: .5”/sec
Power: 40%
Air Pressure: 5 psi

Watch the Build Process:

Custom Foam Tool Kit

Foam Laser Cutter

Custom tool kit

We can all agree that a well organized workspace is key to getting the job done quickly and efficiently. Because every profession requires specific tools for the job at hand, it’s important to have them arranged in an order that works best for you.

Today’s tip will show you step-by-step how easy it is to create a custom foam tool kit using your Kern Laser System.

foam tool drawer

TOOLS NEEDED:
STEP 1:

Measure the workspace you want to organize the tools within.

tool shadowing

STEP 2:

Layout the tools on the surface of the lightbox. Ensure that the tools are kept within the dimensions of your workspace. A buffer zone around the perimeter of the workspace should be considered.

STEP 3:

Using a camera take a centered overhead photo of the entire lightbox extents. Note the dimensions of the lightbox. (In this case, the lightbox is 48” x 24”)

light box

STEP 4:

Import the picture into CorelDraw. Using the Crop Tool, crop the image to the extents of the lightbox. Next, resize the photo to the measurement determined in Step 3 (48” x 24”). This ensures that the tools are sized correctly.

STEP 5:

Using the Trace Bitmap tool, select an outline trace option. For this project, the detailed logo option seemed to result in the best contrast. The PowerTRACE window will now open. Proceed with the following adjustments.

  • Click on the Colors tab and select Black and White (see image below).
  • Select the Settings Tab and adjust your settings until you are satisfied with the outline of the tool shapes (Detail, Smoothing and Corner Smoothness).
  • Select OK.

coreldraw screen shot

tool kit software

STEP 6:

Select the new image

  • Delete the original bitmap.
  • Convert to Curves (Ctrl+Q).
  • Left-click the no fill button, and right-click a color to give it a hairline.
  • Ensure the line weight is hairline.
  • Ungroup all objects (Ctrl+U).

how to cut

STEP 7:

Clean up the hairlines.

  • Use the shape tool (F10) to select individual tools. Review each tool and clean up extra nodes as needed. In this example, we simply deleted the undesired nodes.

outlines nodes

Before

final touch

After

STEP 8:

For certain tool shapes, like circles and squares, it may be easiest to measure the item and create the general shape to match the size you require. This eliminates the need for cleaning up shapes that can be easily created.

completed file

combine lines

STEP 9:

In this specific project, we added a circle over each tool and used the Weld tool to create an easy access point.

foam laser kit

Before: 1.5″ Centered circles over the handles

graphic design software

After Weld

STEP 10:

Laser cut a samples template (optional). To double check your design, laser cut the file into cardboard to ensure the tools are placed where they are desired. Make any adjustments as needed.

foam cutting head

template

STEP 11:

Finally, laser cut the tool foam to create a neatly organized workbench or tool kit!

completed foam

To order a 52″ x 25″ Light Panel please visit our LaserLocker.com store.

light box kit

laserlocker.com

If you have questions about this application or the “how-to” process, please feel free to contact us at info@kernlasers.com.

Maintenance Tip – Chilling Units

etched wood

Longtime Kern Lasers employee, Jake Shaw, has created a vast library of technical support videos focused on installation, training, and maintenance of Kern’s laser systems. This week Kern is focusing on the importance of maintaining your chiller system. Common chiller maintenance procedures include checking for water leaks, cleaning/replacing filters and replacing chiller fluids.

description

The five video links below highlight maintenance on the  Polyscience and S&A chilling units.

POLYSCIENCE 1.5HP CHILLER MAINTENANCE
POLYSCIENCE 3HP CHILLER MAINTENANCE
POLYSCIENCE 3/4HP CHILLER MAINTENANCE
S&A CW-6000 CHILLER MAINTENANCE
S&A CW-6300 CHILLER MAINTENANCE

Laser Room Walk-Through

laser training industrial

Laser Room Walk-Through

Marketing Coordinator, Adam Voigt, walks through Laser Testing Room 1 and demonstrates the OptiFlex, HSE and FiberCELL laser systems.

For more information on Kern’s complete line of laser systems, please email our friendly sales team or give us a call at 218-631-2755.